
了解如何通过检查IP设置、从LCD屏幕或Web界面配置SIP帐户以及逐步验证注册状态来解决电话注册问题。
本指南旨在帮助解决电话上的注册相关问题,并帮助用户有效识别和解决问题。
本指南适用于我们所有的电话型号。
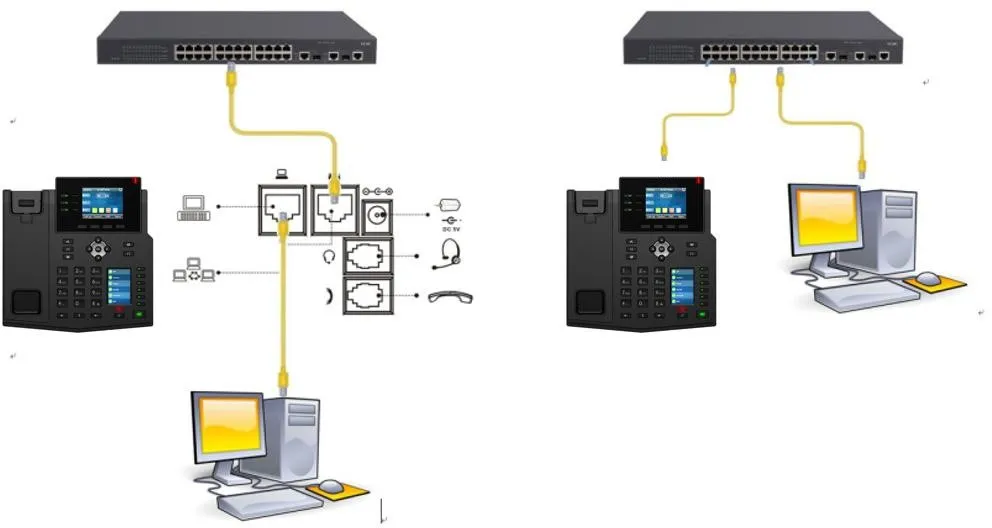
① 两台 BX4U 电话连接到交换机,并且能够自动获取 IP 地址。
② 一台配置 PC 连接到同一台交换机,且 PC 与电话之间的网络通信已确认。
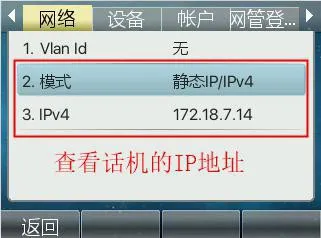
在电话 LCD 屏幕上,前往 菜单 — 状态 以查看电话的当前 IP 地址。
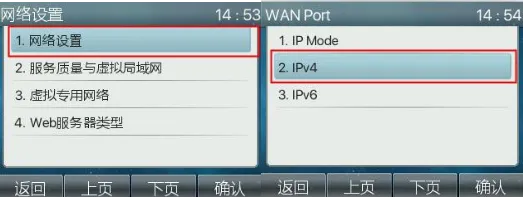
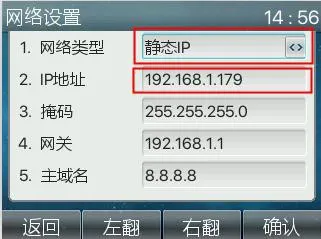
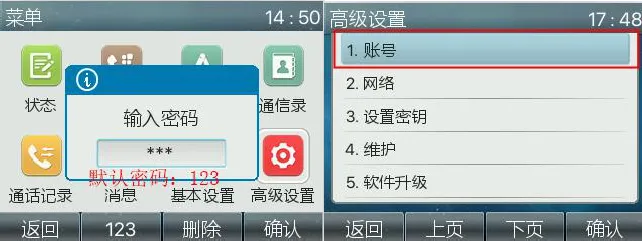
在 LCD 屏幕上,前往 菜单 -- 设置 -- 高级设置(默认密码:123) -- 网络 -- 网络设置 -- 网络类型 -- 静态设置,然后输入所需的 IP 地址信息,并点击 保存,如下图 1 至 7 所示。


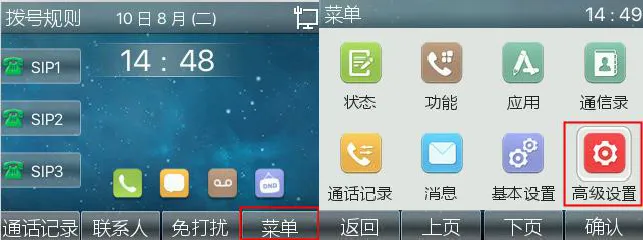
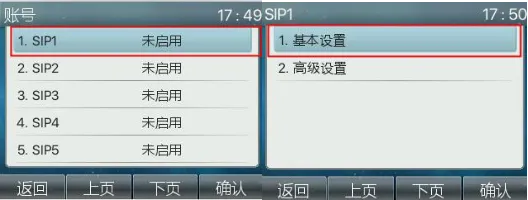
在 LCD 屏幕上,前往 菜单 -- 设置 -- 高级设置(默认密码:123) -- 账户 -- SIP1 -- SIP 基本设置,然后输入服务器地址、服务器端口、SIP 用户名、认证用户名、认证密码和显示名称,如下图 1 至 9 所示。
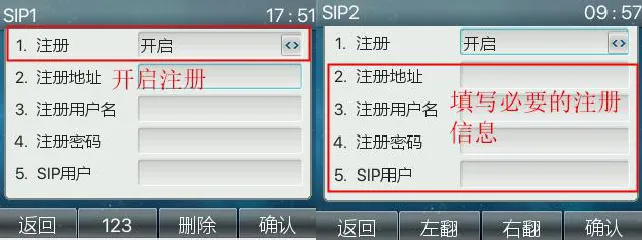
注意:注册期间,请确保输入服务器地址、注册账户、用户名和密码。同时,在保存配置前请确保账户已启用。
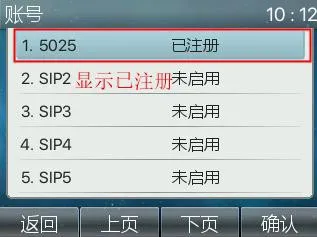
前往 菜单 -- 设置 -- 高级设置(默认密码:123) -- 账户,然后检查线路状态是否显示为已注册。
在电话 LCD 屏幕上,前往 菜单 — 状态 以查看电话的当前 IP 地址。
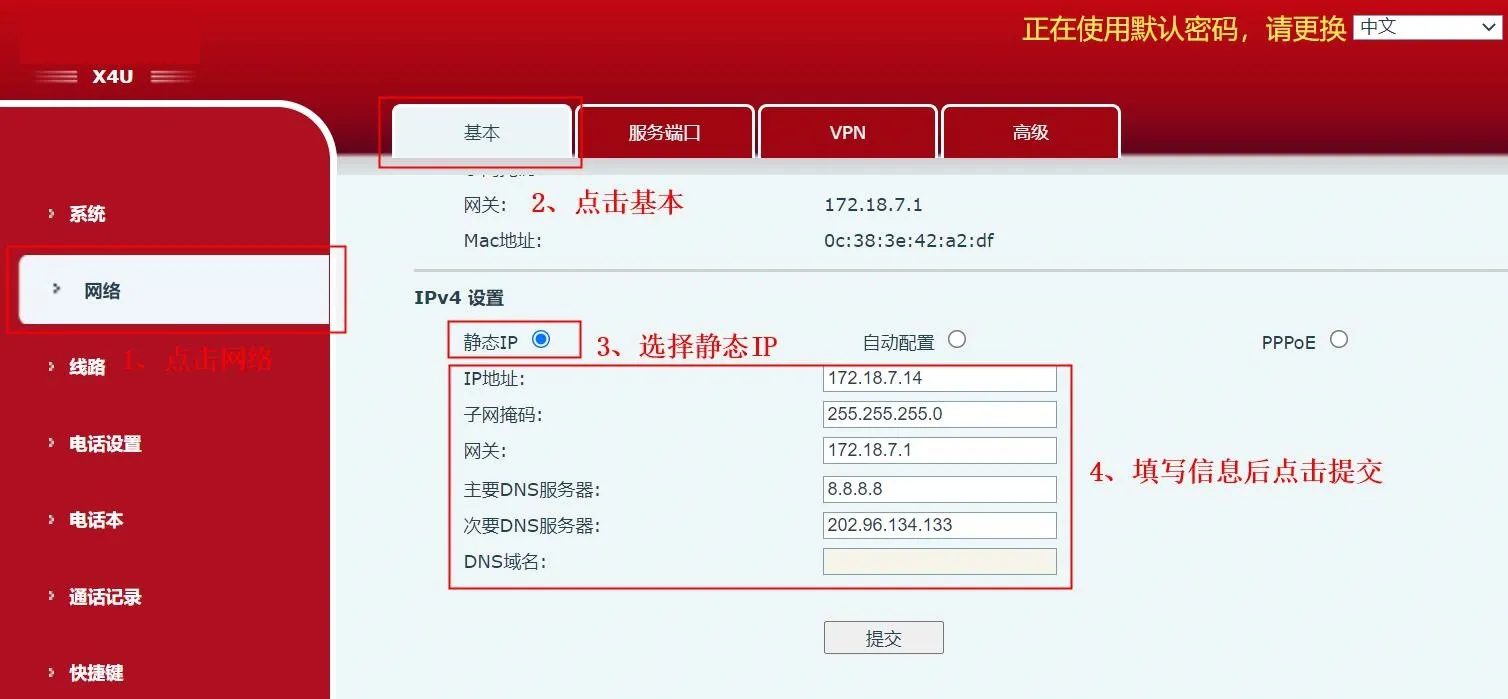
在 PC 上打开浏览器,并在 地址栏中输入电话 IP 地址。

如有需要,请更改电话 IP 地址。
前往 网络 — 基本,在 设置部分选择 静态 IP,输入所需的 IP 地址信息,然后点击 提交。
前往 线路 -- SIP -- 基本设置,然后输入 SIP 账户信息、密码、端口、服务器地址和其他所需详细信息。启用账户并点击提交。
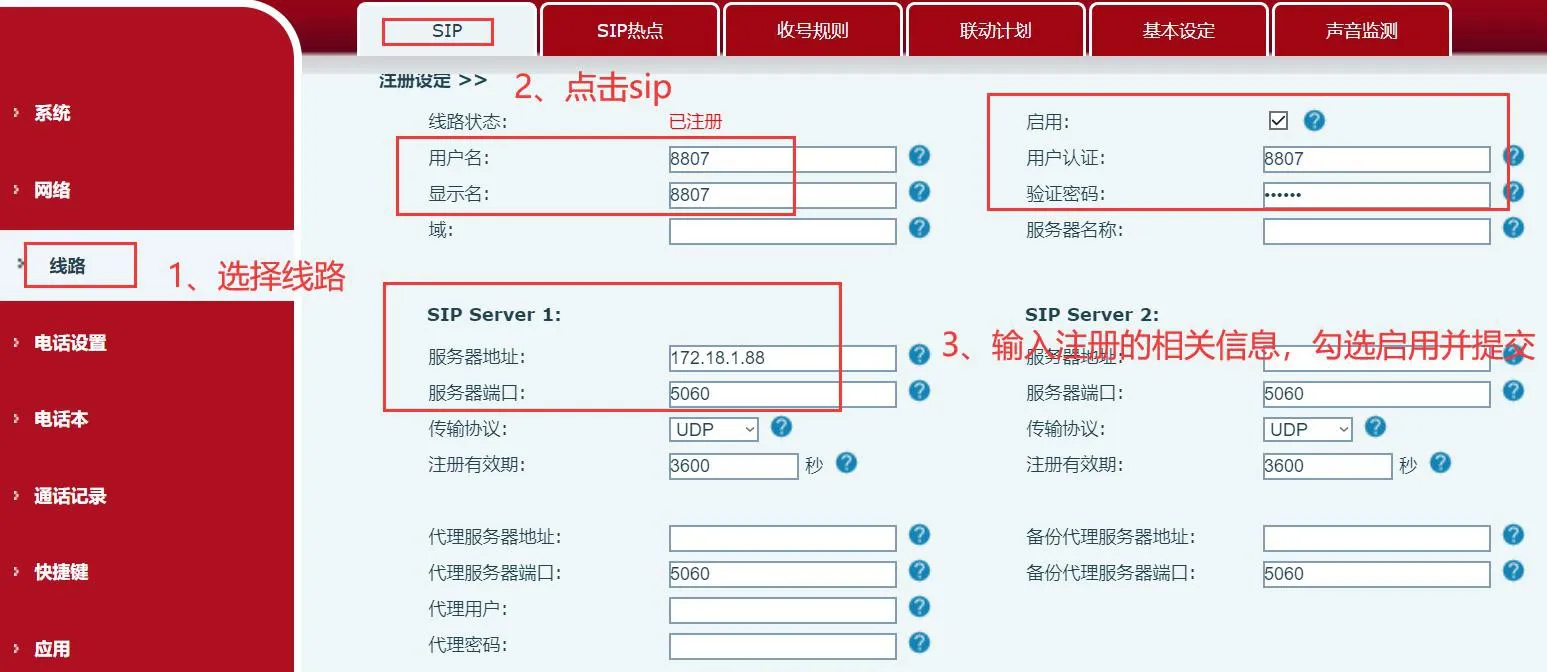
在 线路页面上检查线路状态。如果状态显示为已注册,则表示电话已成功注册,并可拨打和接听电话。